 ryanwalls
As engineers making our own blog, we all naturally want to make it AAAAAAWESOOOME. We want a cool language. We want to use git everywhere. We want PRs! We want it to be fast. We want automation, lots and lots of automation. We also want it simple. Like “1 or 2 hours” simple.
This blog you’re reading has all of that.
It…. Is….. Awesome.
But we can’t really take credit. Thanks to Hugo, Github, and Wercker you too can have an have an AAAAAAWESOOOME site or blog.
What this combination gives you:
- Cool language? Hugo is based on Go. Check. (My love of Go will be professed in a future post.)
- Git integration? This site is deployed to github pages. This site is regenerated and deployed every time we push to the main repo.
- PRs? We only push to the main repo through PRs from our individual forks. For those new to git flow, check out this article: http://scottchacon.com/2011/08/31/github-flow.html
- Fast? Yep, super fast. Hugo is a static site generator, meaning it creates plain old HTML. Browsers are very good at serving HTML quickly. Also, Hugo generates the static content very quickly… about 1 ms per piece of content. For this site, it seems instantaneous.
- Automation? That’s where Wercker comes in. You can have build and deploy steps for your github repo that get triggered automatically. Credit goes to https://github.com/ArjenSchwarz/wercker-step-hugo-build for creating a Hugo build step, and to https://github.com/lvivier/step-gh-pages for the step for deploying to Github Pages.
- Simple? Honestly, start to finish it took me a full day to get everything working… but that includes research time. If you’re reading this, then you should be able to do it in a couple hours. I’ve done some of the research for you. (i.e. I found the only link you will need below.)
- Pretty? That wasn’t in my original list above… pffft, engineers don’t need “pretty.” Well, I like pretty. Sue me. Visit https://themes.gohugo.io to get a taste of what you could do by simply cloning the theme into your “themes” directory.
You’re probably saying… “Sounds awesome. How do I do it?”
Simple. The guide to awesome is here: http://gohugo.io/tutorials/automated-deployments. Follow the steps in that tutorial. If you want to see what I did while following those steps, read on…
An example, our corporate site
Following my own advice, I am now embarking on converting our corporate site to Hugo and Wercker. I’m going to capture the steps I take for posterity… and to show that setting up an awesome site from scratch is relatively straight forward.
Hugo site setup
- Create github repo. e.g. https://github.com/3DSIM/corporate-site
- Fork the repo.
- Clone the fork.
git clone git@github.com:ryanwalls/corporate-site.git - Generate a new site directory structure.
hugo new site corporate-site --force(The force option is necessary because our directory is not empty.) - Go into the cloned directory.
cd corporate-site - Create a git branch to work in.
git checkout -b new-site - Install a theme
mkdir themes && cd themes- Clone a theme. E.g.
git clone git@github.com:digitalcraftsman/hugo-agency-theme.git - In this case they had a sample
config.toml, so copy it to root of your projectcp themes/hugo-agency-theme/exampleSite/config.toml . - Remove the
.gitfolder from the cloned theme:rm -rf themes/hugo-agency-theme/.git
- Test that site starts
hugo server --buildDrafts --theme=hugo-agency-theme - You’ll want to customize your
config.tomlto fit your site. (if you’re new to toml read https://npf.io/2014/08/intro-to-toml). See the source for the corporate site to see what we did with ours. - Eventually you’ll want to put content inside the
contentdirectory, but for now just put an empty file, README, or some other placeholder in there so that the directory gets committed later. e.g.touch content/.keep. This is to accommodate one of the wercker build scripts we will use later that requires thecontentfolder exists.
Configure Wercker
- Create a
wercker.ymlfile in the root of the site directory
---
  box: debian
  build:
    steps:
      - arjen/hugo-build@1.9.2:
          version: "0.15"
          theme: hugo-agency-theme
          flags: --buildDrafts=true
  deploy:
    steps:
      - install-packages:
          packages: git ssh-client
      - lukevivier/gh-pages@0.2.1:
          token: $GIT_TOKEN
          basedir: public
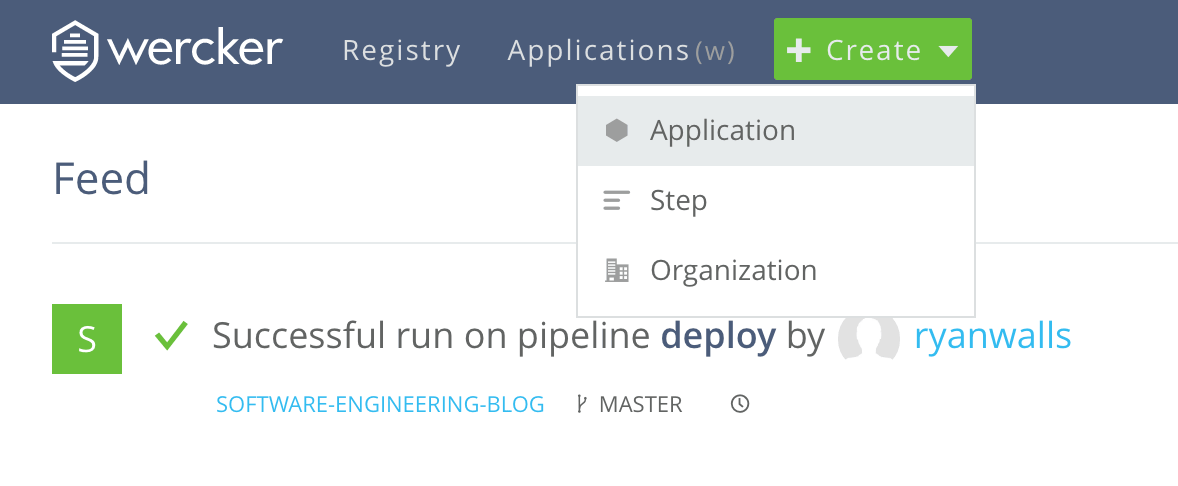
- Create application inside Wercker
NOTE: This is where the tutorial linked above that is on the Hugo documentation site is out of date. Wercker just recently announced pipelines and workflows.
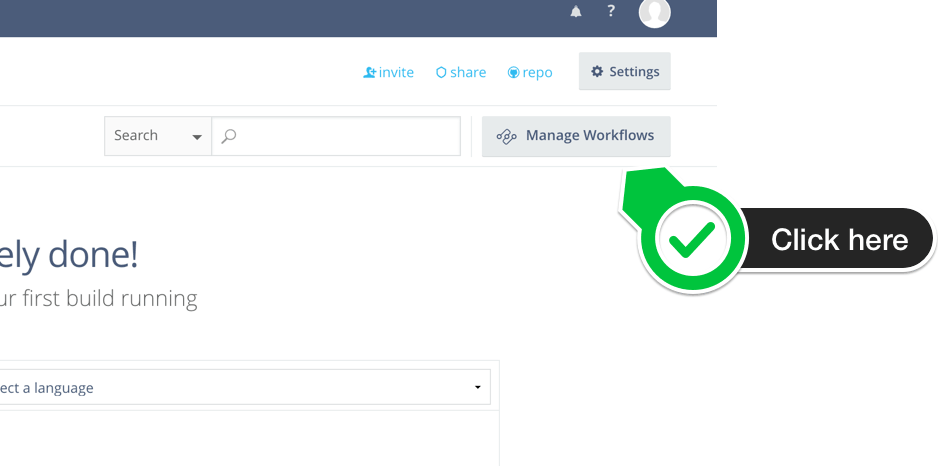
Click on “Manage Workflows” while in your application
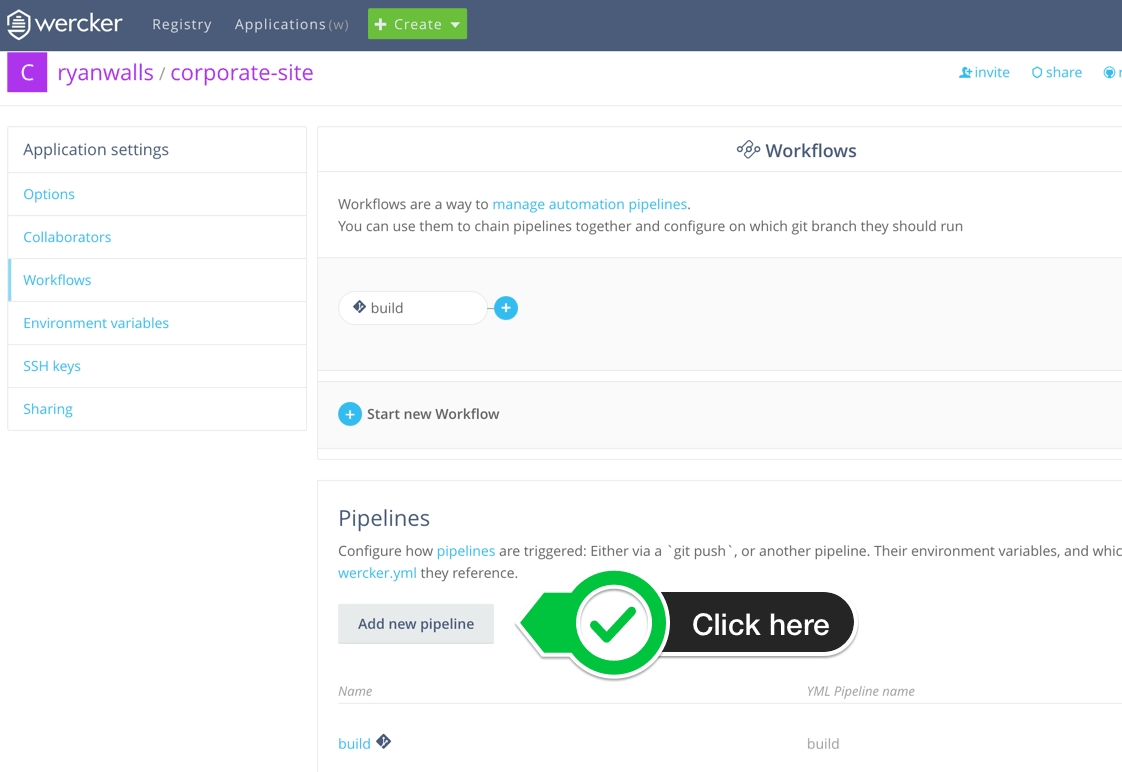
Click on “Add pipeline”
Configure the pipeline. This references your deploy step in your
wercker.yml.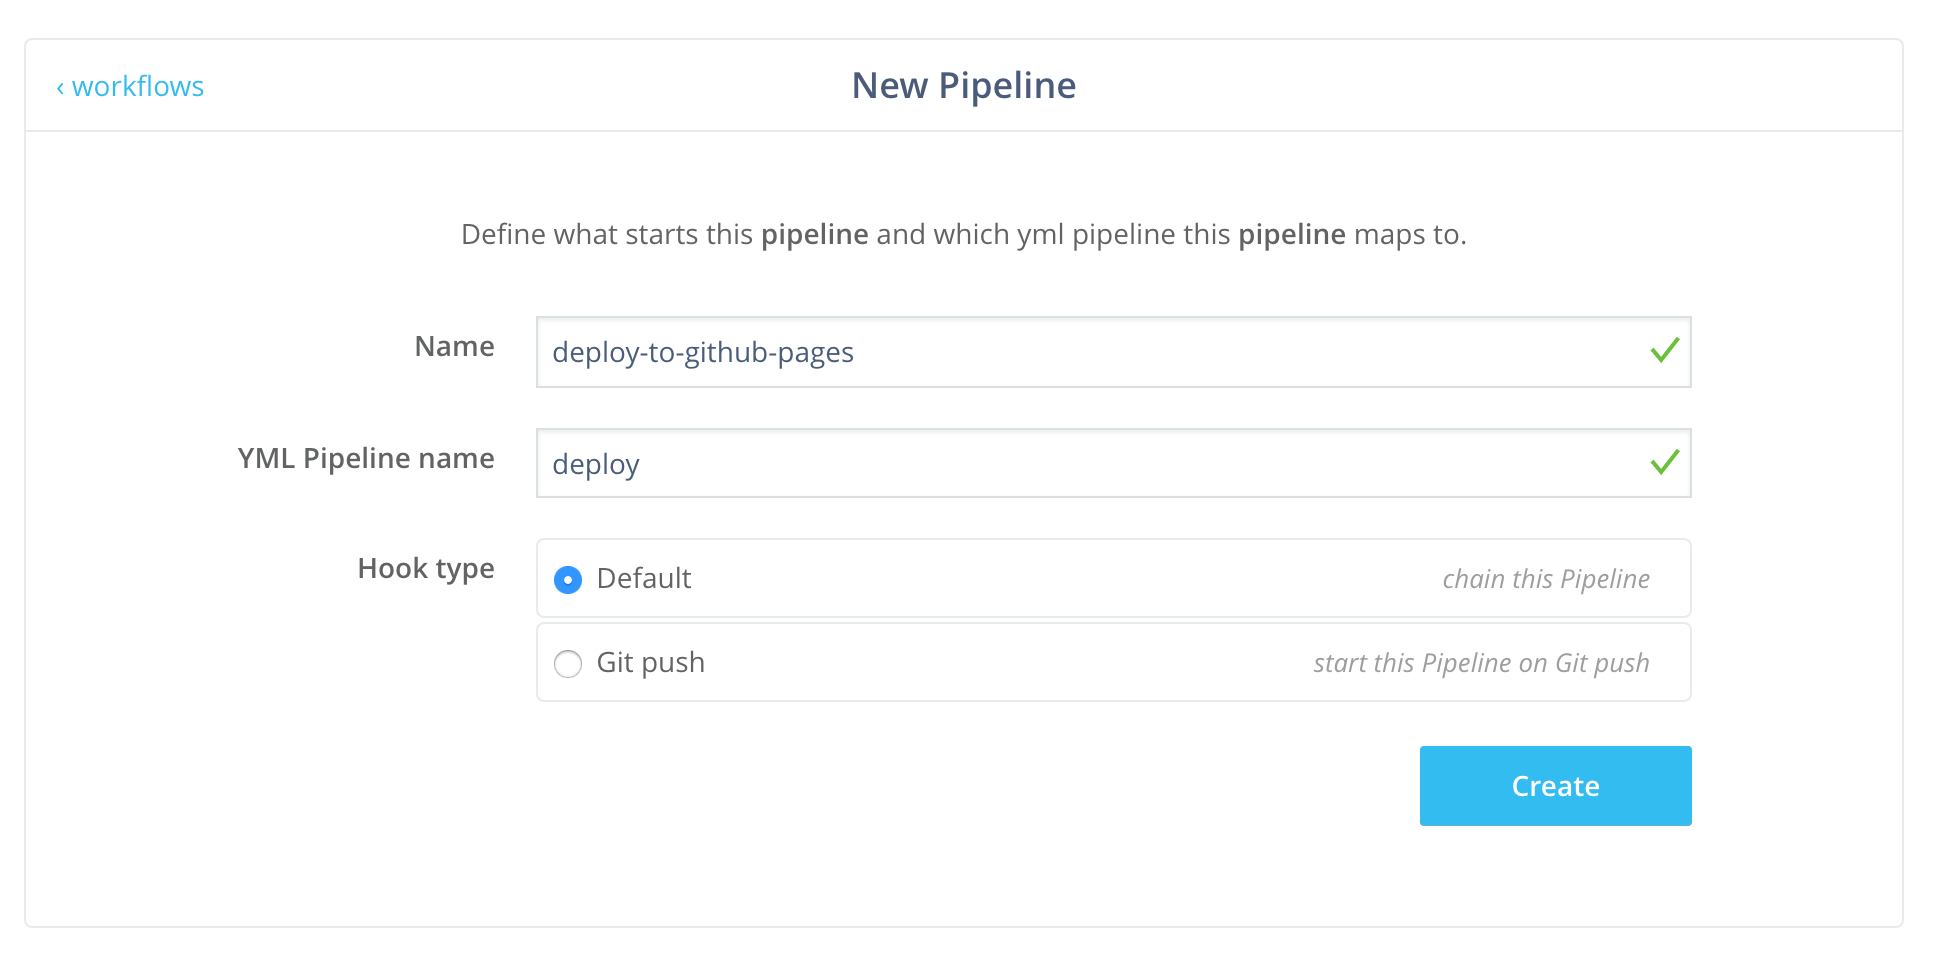
After you configure the pipeline, the next page allows you to configure environment variables for the pipeline. Before filling this in, go to the next step… but keep this page open.
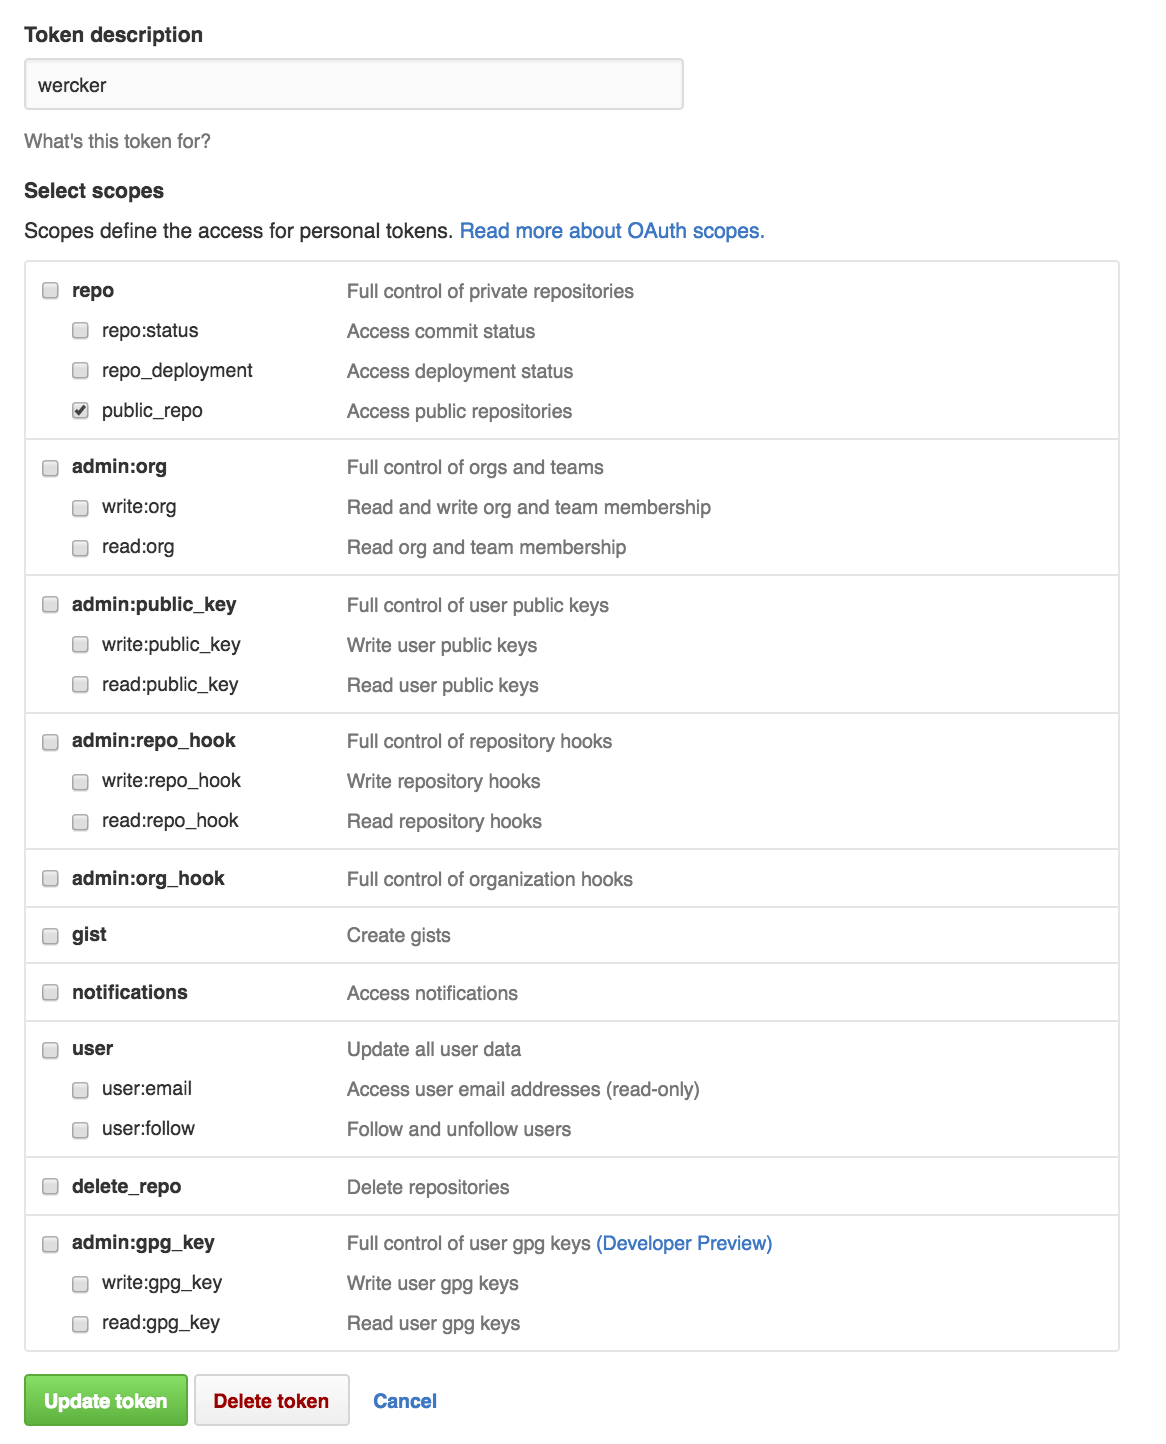
Wercker needs to be able to access Github on your behalf to deploy to Github Pages. To give wercker access, we will create a Personal Access Token. If you’re new to Personal Access Tokens, here’s Github’s intro: https://help.github.com/articles/creating-an-access-token-for-command-line-use. Follow the steps in that article to generate a token. Here’s the box I checked for this personal access token:
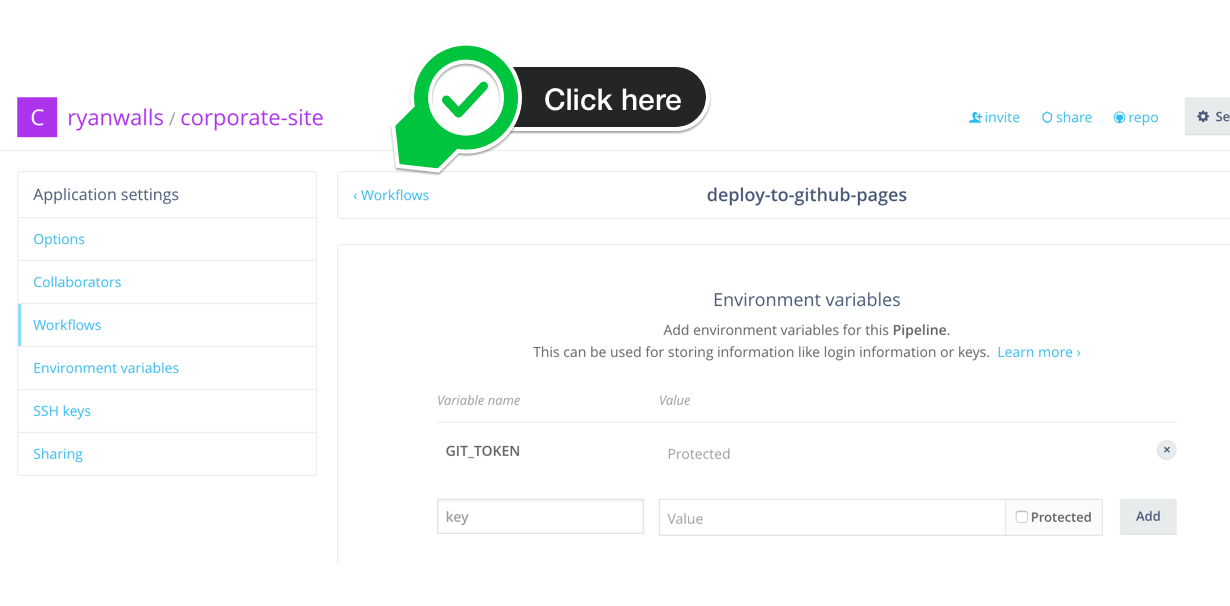
We can now configure the
GIT_TOKENenvironment variable that was defined in thewercker.ymlabove. Copy the personal access token from last step and enter it on the Wercker “Environment variables” configuration page. Name itGIT_TOKENand set it as protected. Click “Add.” .
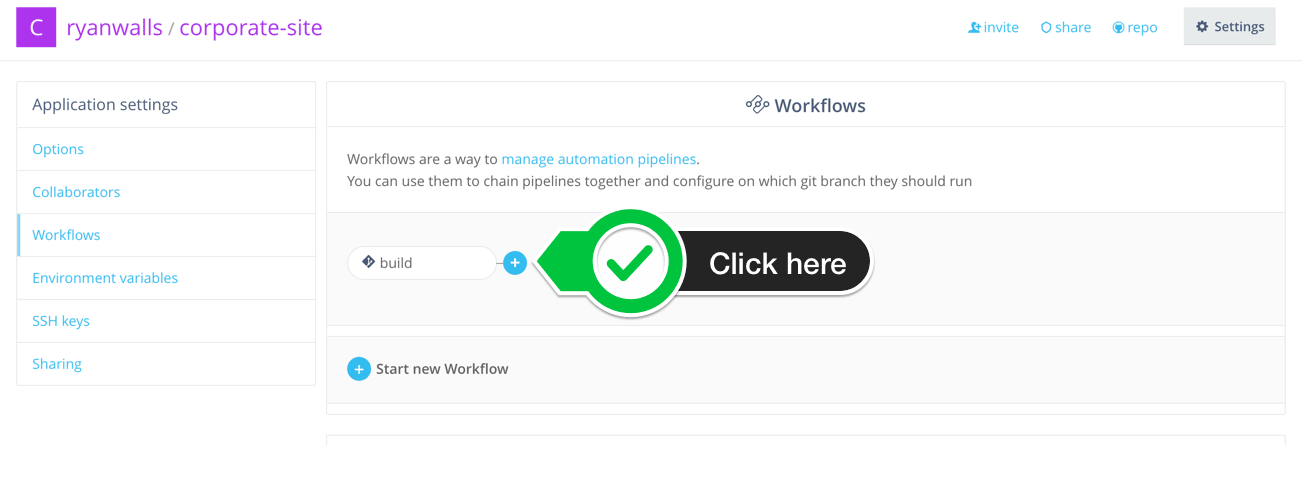
.We now need to configure our workflow to use the “deploy” step we just defined. Click on the “< Workflows” link.
 .
.
Then click the “+” button after your “build” step
 .
.
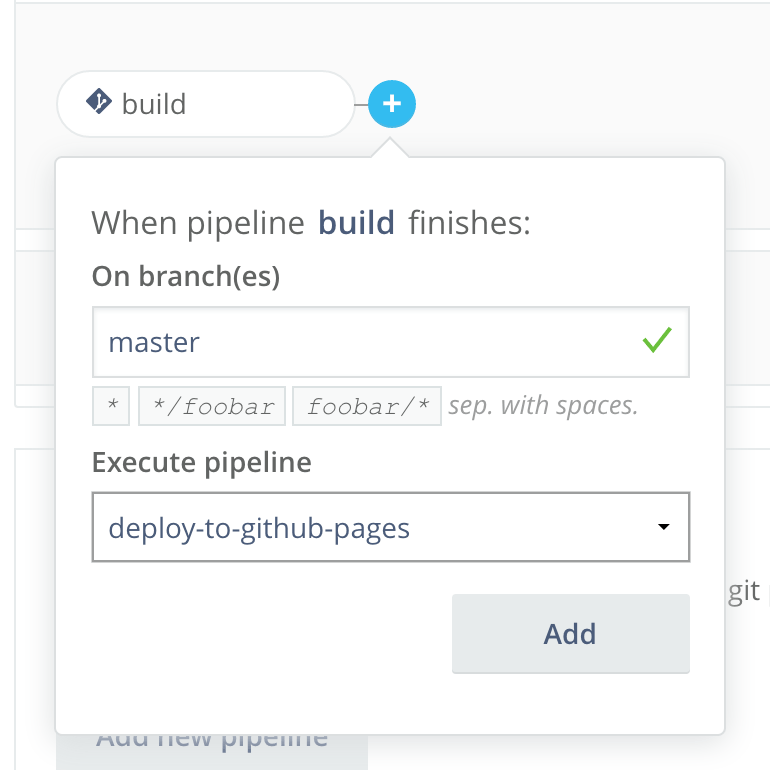
And configure the deploy step to deploy your “master” branch. Click “Add.”
 .
.
Push the first version of the site
You are now ready to create a PR with your changes. When the PR is merged, Wercker should trigger a build and deploy automatically.
git add .git commit -m "Add theme to site"git push- Navigate to your fork on Github and create a PR. See https://help.github.com/articles/using-pull-requests. NOTE: The wercker pipeline will trigger when you create a PR, which is great because you know before you merge if you broke the build. But in this first PR, the build will always fail because we haven’t added a
wercker.yml.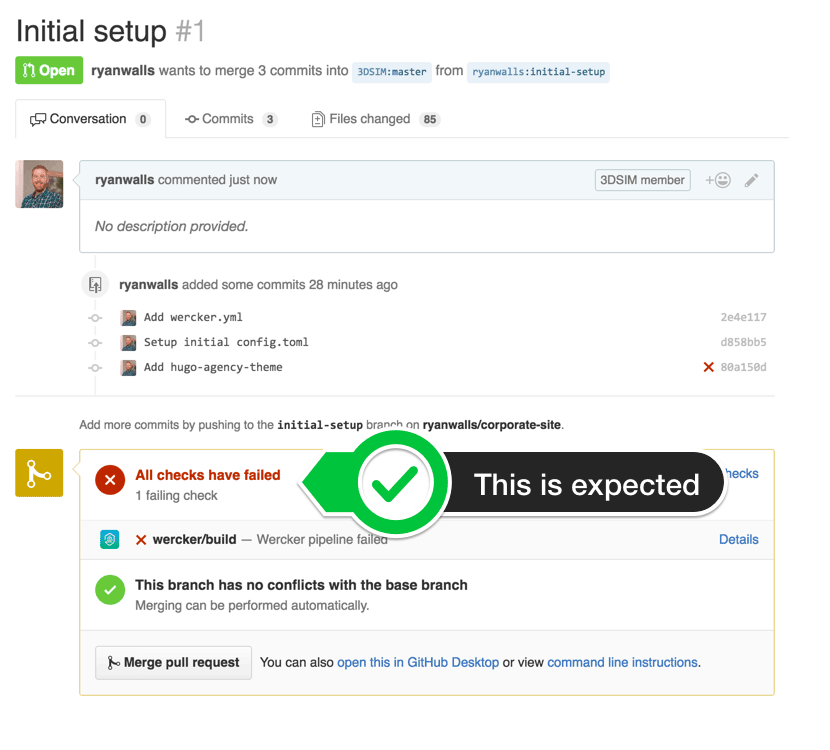 .
. - Merge in your changes (after reviewing with someone else of course).
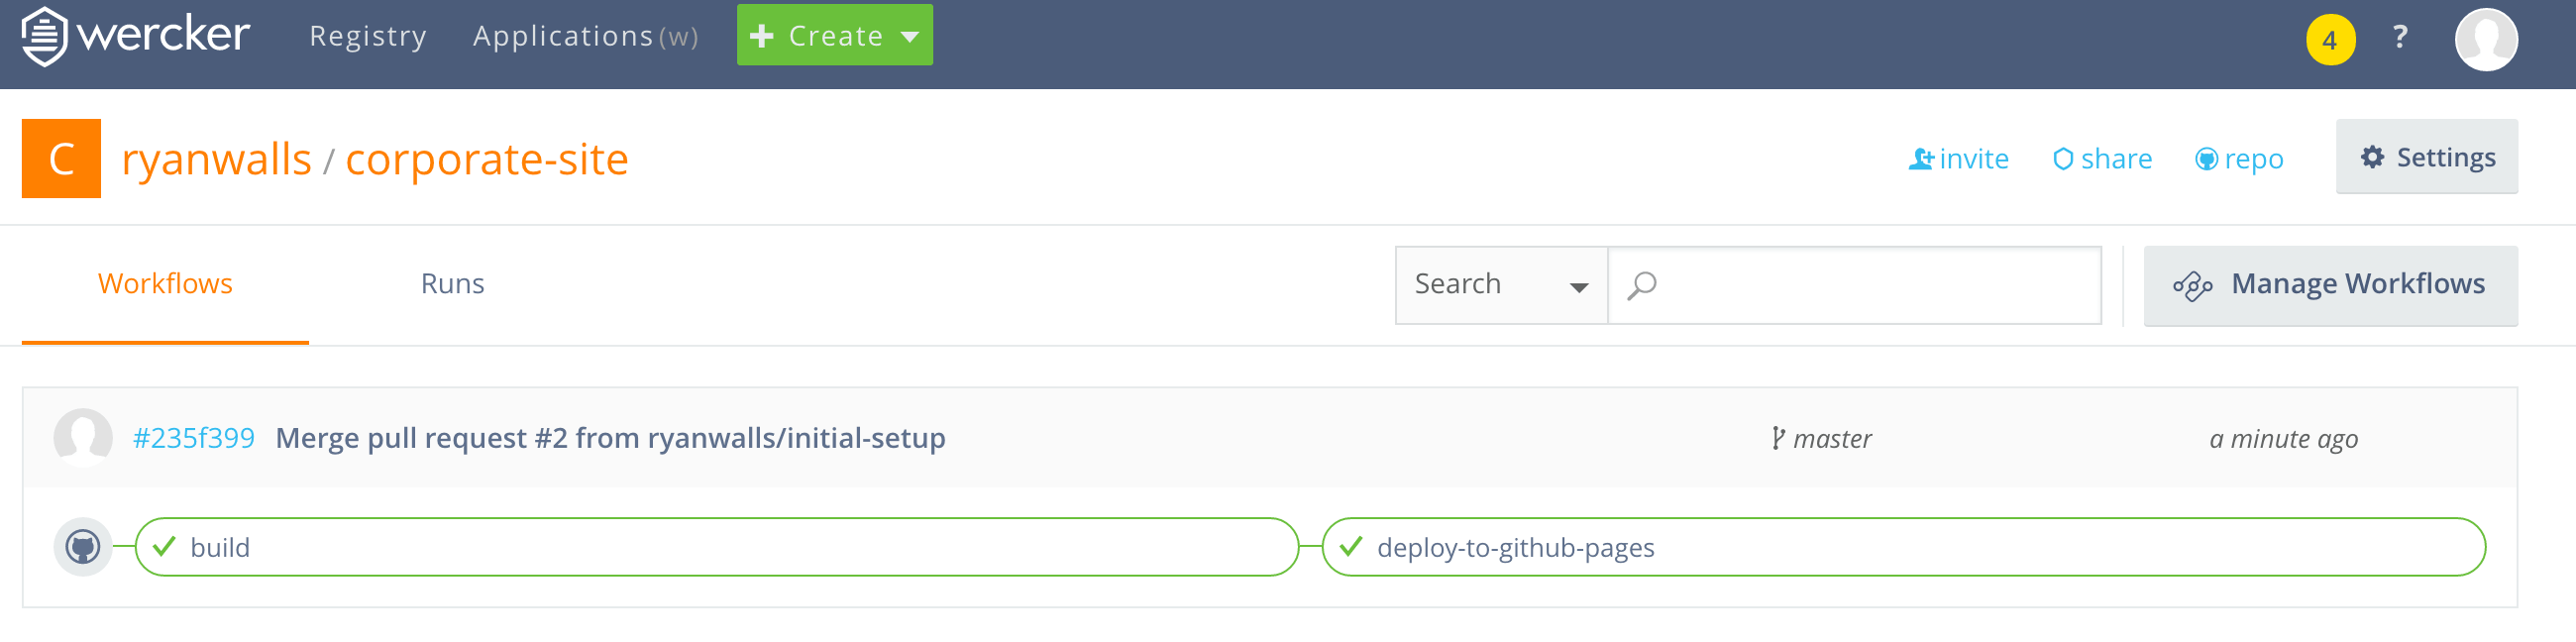
- Go to Wercker and see if your build is working. If you see this at the end, you succeeded!
 .
.
Success
- Navigate to your new site at
http://<your github username or organization>.github.io/<your site's repo name>, e.g. http://3dsim.github.io/corporate-site
It should like similar to this… (This screenshot was taken with only a couple changes to the config.toml.)
 .
.
If you made it this far, you now have a fully automated site or blog using Hugo and Wercker. Go pat yourself on the back and get some coffee.